CTF Infrastructure for Dummies
As part of my school’s run of the Youth Cyber Exploration Programme, I had the chance to learn to set up a CTF infrastructure on my own, with the help of my Uncle Google.
This blog article serves as a guide for others (and future me) to run a CTF infrastructure.
Overview
Technologies Used:
- Docker: For automating the deployment of apps in containers
- CTFd: Platform used as the web interface for the CTF
- CertBot: To obtain SSL certificate to get the infra website to HTTPS
- Cloudflare: Proxy to deploy WAF (read more below)
- Azure VM: Used to host the main CTFd container
- Amazon EC2: Used for challenges that required hosting (e.g. web, pwn, etc.)
- Vercel: Used for hosting some web challenges
The steps below outline how to set up each of the technologies, in order of what is recommended (based on my own experience).
Azure VM
The main reason why I used Azure was because we were a little tight on budget, and Azure has some Education Credit stuff for students.
Creation
This part is pretty simple, you have to name your VM and create a new resource group. I named mine CTFd
and YCEP24 respectively, but you can name them anything you want. As for the region, pick the one that’s
geographically the closest to you. For the image, I picked an Ubuntu 20.04 x64 machine.
The size right now is not extremely important, since Azure allows for fairly simple resizing of the machine. I selected
the Standard_B2s originally, which I upsized the night before the CTF out of fear to a D4s_v3 (it has more vCPUs and
RAM, but is also significantly more expensive).
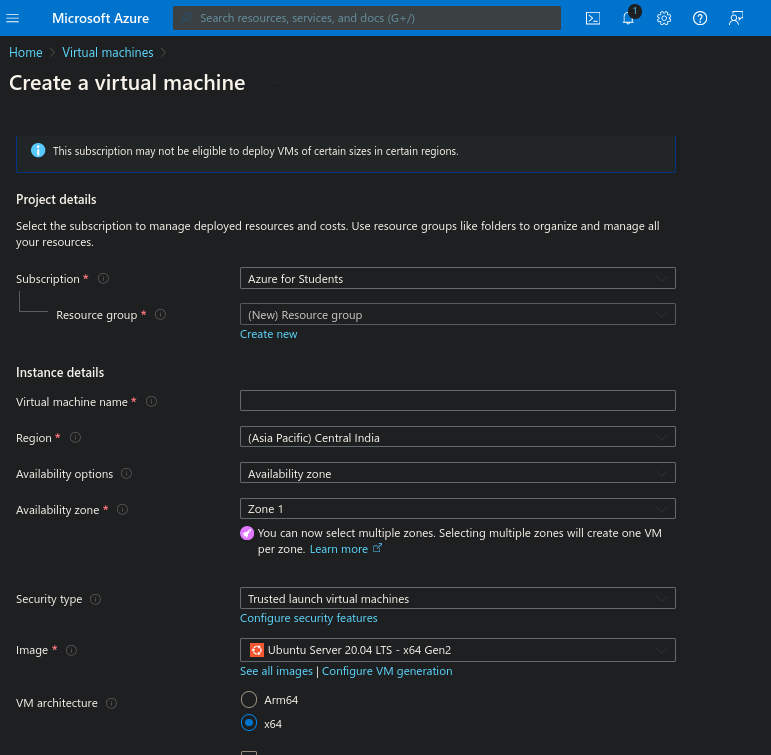
Additionally, it is vital that you Generate new key pair for SSH, which is how you will access the machine later
on. Remember to allow SSH, HTTP, and HTTPS too.
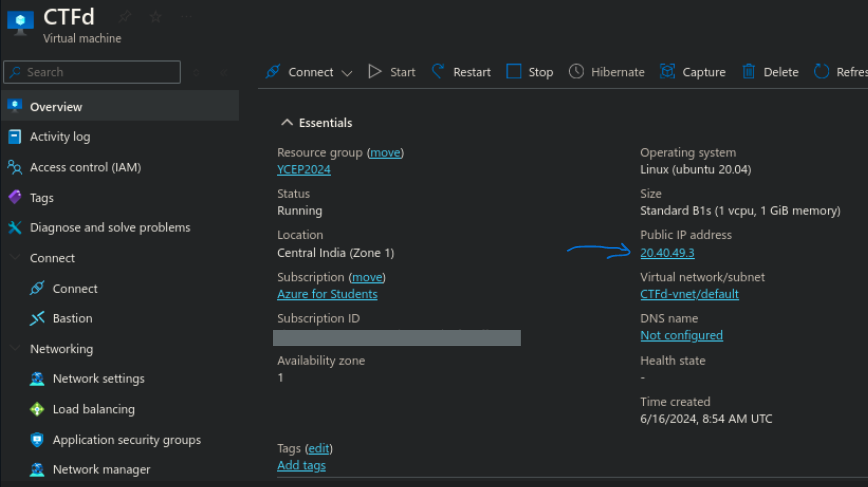
Connection
Connecting is rather straightforward:
1
ssh -i key.pem user@<serveripaddr>
The IP address can be found in the VM’s config under the Public IP Address field.
CTFd on Azure + Cloudflare
Now that you have access to the Ubuntu machine, you would have to do a little bit of installation first.
Getting the instance up
1
2
3
4
sudo apt update && sudo apt upgrade -y
sudo apt install docker.io docker-compose
git clone https://github.com/CTFd/CTFd.git
sudo docker-compose up
This may take a while, and eventually, if you were to paste the IP address of the server in your web browser of your own machine, you will be on the CTFd page. Follow the onscreen instructions and you’ll be fine.
Setting the theme
I personally used the CTFd-Odin-Theme to give the platform a nicer feel, but this is completely optional.
1
cd CTFd/CTFd/themes; git clone https://github.com/0xdevsachin/CTFD-odin-theme
Then, login as admin and visit Admin Panel > Config > Themes and select the CTFd-Odin-Theme. I’ll leave it to you
for the rest of the CTFd configs.
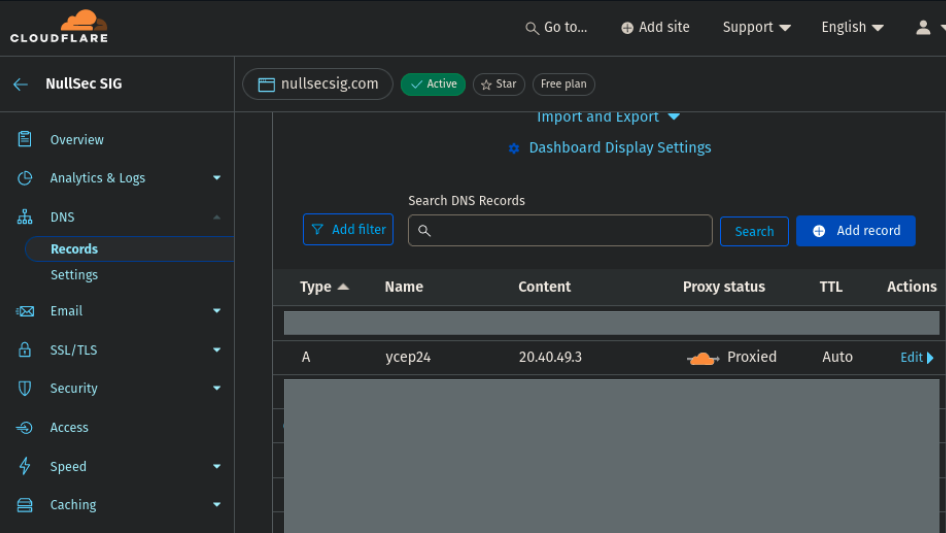
Binding the domain
For this CTF, we used a subdomain under our club’s nullsecsig.com domain. We use Cloudflare,
but any registrar would work. Add an A type record with the subdomain as the Name, and the Content being the IP
address of the server. Ensure that the Cloudflare proxy is enabled (if you want to use the WAF).
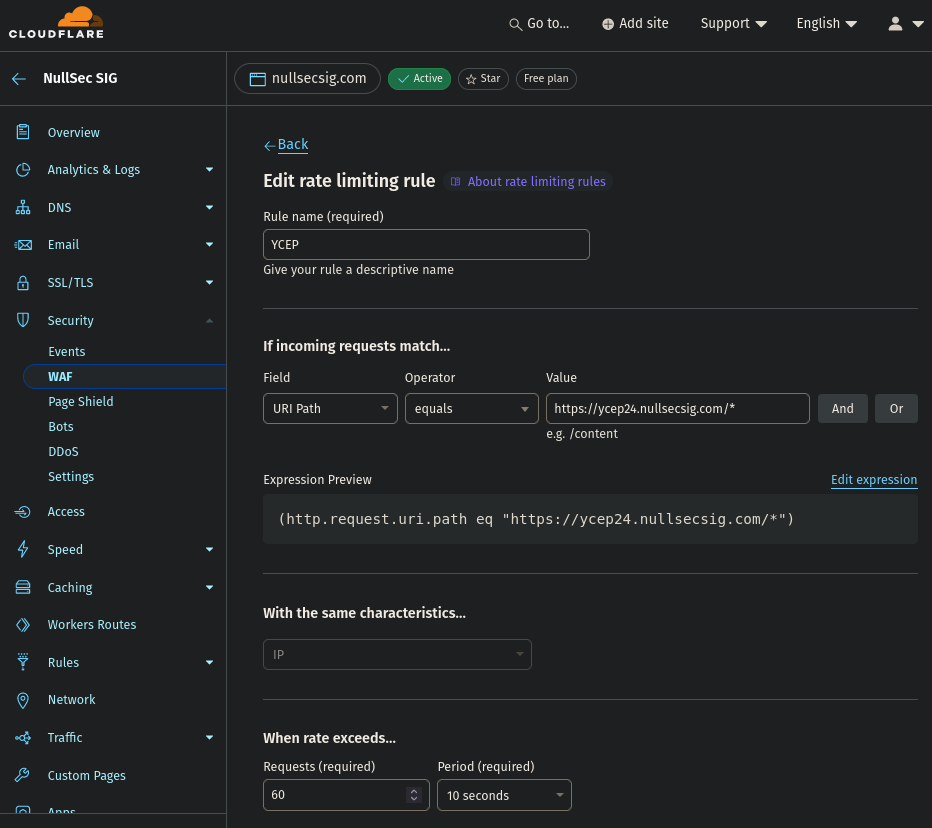
Web Application Firewall (WAF) for rate limiting
To ensure that the server does not crash, I implemented rate limiting, to ensure that DoS attempts would get blocked.
CertBot
To get the website to HTTPS, you would need to install CertBot. This is a pretty simple process. You can follow the documentation here.
Essentially, the steps are:
-
Generate a certificate:
1
2
3
4
 docker run -it --rm --name certbot \
           -v "/etc/letsencrypt:/etc/letsencrypt" \
           -v "/var/lib/letsencrypt:/var/lib/letsencrypt" \
           certbot/certbot certonly
When prompted, select the
Standaloneoption, and accept the terms (typey). -
Copy the certificates to the CTFd directory:
1
2
 sudo cp /etc/letsencrypt/live/<yourdomain>/fullchain.pem ./conf/nginx/fullchain.pem
 sudo cp /etc/letsencrypt/live/<yourdomain>/privkey.pem ./conf/nginx/privkey.pem
-
Modify your docker-compose (
docker-compose.yml) configuration:1 2 3
- ./conf/nginx/http.conf:/etc/nginx/nginx.conf - ./conf/nginx/fullchain.pem:/certificates/fullchain.pem:ro - ./conf/nginx/privkey.pem:/certificates/privkey.pem:ro
-
Add https port mapping to the same file:
1
2
3
 ports:
   - 80:80
   - 443:443
// TODO